Tutorial sewing chic zippered pouch
This tutorial explains how to sew a pretty pouch with lining, zipper, and flat bottom. It accompanies the smart sewing kits for pouches from Fibra Creativa.
This tutorial can be used with other fabrics, but no pattern is included, as it is not necessary when using the kit.
Sewing tutorial for zipped pouch: Necessary materials and contents of the sewing kit
The smart Fibra Creativa PRINTS sewing kit contains the materials needed to sew the zippered pouch:
- a fabric panel printed with all the necessary pieces: front and back of the pouch, lining fabric, and small fabric strips for the clean finish strips and/or a handle.
- a zipper to close the pouch
Interfacing is not necessary, as the fabric is thick enough to give good structure to the pouch, unless you want a very rigid pouch.
You will also need sewing thread matching the pouch pattern color, and your usual sewing supplies. The instructions are given for machine sewing. A zipper foot is very useful.

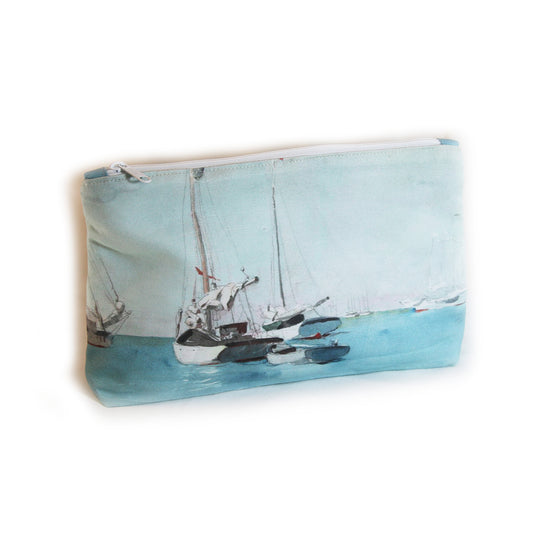
Throughout this tutorial, we will sew the pouch Key West kit, illustrated with tropical marine landscapes with sailboats, one of my favorite patterns. (It's my travel toiletry bag, here nothing goes to waste, we find a use for the samples!)
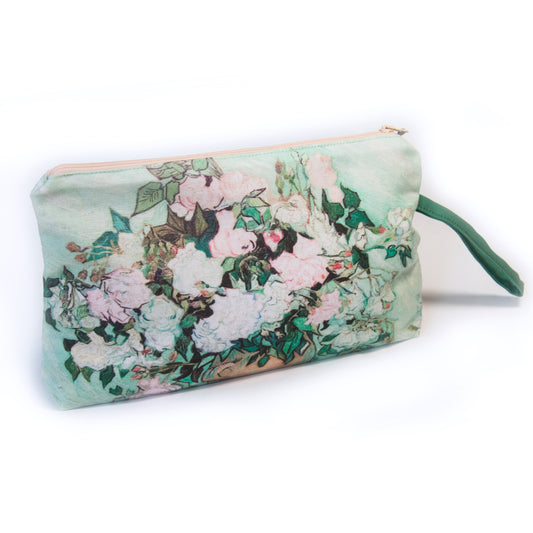
The sewing kit pouch panel, in the photo above, includes 4 pieces printed with sailboats for the two outer sides and the two sides of the lining. But since the patterns look quite similar and can be confusing, to facilitate understanding of the tutorial, I use a customized version with a monogrammed lining, which clearly visually differentiates the outer fabric and the lining. All Fibra Creativa PRINTS zippered pouch models are sewn the same way.
Here are the steps to sew your zippered pouch with a cardboard bottom:
- Cut the fabric swatch
- Prepare and attach the zipper
- Close the pouch and form the bottom
- Turn the pouch inside out and finish it.
Sewing tutorial pouch step 1: Cut the fabric pieces
Cut the fabric panel provided in the kit following the edge of the pieces. A 1 cm sewing margin is included. You will get 6 pieces:
- the front and back of the pouch (marine landscapes)
- the 2 pieces of the lining (in this case monogrammed print)
- 2 narrow strips of fabric. One is used to cover the ends of the zipper, to achieve a nice clean finish. The other can be used to add a handle (optional) if you wish.

Tip: The pieces for the outside and the lining are completely interchangeable, so you can decide which pattern you prefer to place on the outside or use as lining, or even mix the patterns, why not?
Pouch sewing tutorial step 2: Prepare and attach the zipper
We will first prepare the zipper, then attach it to the outer pieces and then to the lining pieces.
Cover the zipper ends with clean finish strips
Let's start by covering the 2 ends of the zipper with small pieces of fabric.
This detail is not essential, but it is not complicated and the finish is so much nicer, so why not do it?
To do this, cut 2 small pieces 5 cm long from one of the fabric strips intended for this purpose. Fold in half, then fold the ends towards the middle, as seen on the right in the photo below.
Place this small piece straddling one end of the zipper, and sew it close to the edge by machine to secure it, as shown on the left of the photo.

Now measure the zipper against the top of the front of the pouch and cut the other end so that the zipper is 1 cm shorter than the fabric on each side, as above.
Then place the remaining folded fabric piece on the other end of the zipper. If it is open, be careful that the two sides of the zipper do not separate (you can hand sew 2 or 3 stitches if needed).
The zipper is now ready to be sewn in place.
Sew the zipper onto the outer pieces of the pouch
Pin the closed zipper to the top of one of the front fabric pieces, right sides together, making sure it is well centered on the fabric. (There should be 1 cm left at each end, as indicated by the arrows).

Now, sew the zipper in place using the zipper foot. Before reaching the end of the sewing, carefully move the slider to the other side, then finish sewing to the end.
Repeat the operation to attach the zipper to the other side of the outer fabric. The two outer fabric pieces should now be connected by the zipper, as shown below.

Attach the pouch lining to the zipper
We will now attach the lining pieces to the zipper, one after the other.
Using clips (or if not available, pins), attach the right side of the lining to the wrong side of the zipper, as shown below.

Then turn the pouch so you can see the seam previously made to attach the zipper to the outer piece, and stitch exactly over this seam. (In the photo below, I drew the orange line slightly offset so you can see the first seam, over which you must stitch.)

Repeat this step to attach the second lining piece to the other side of the zipper. We now have the two lining pieces sewn on the wrong side of the zipper (photo below), while the two outer fabric pieces are sewn on the right side of the zipper.

Press the fabric with a hot iron before topstitching on the right side on each side of the zipper, very close to the fabric edge, as indicated below by the arrows.
This topstitching is optional but it gives a better finished look,... and prevents the fabric from getting caught in the zipper when using the pouch!

And now, it's time to close our pouch!
Sewing pouch tutorial step 3: Close the pouch and form the bottom
If you want to add a handle to the pouch, now is the time to prepare and insert it before sewing the sides, so it can be caught in a side seam. The remaining fabric strip can be used for this purpose. (This step is not shown here.)
Sew the sides of the pouch
We will now sew the sides of the pouch, starting with the outer fabric, then the lining.
Be careful, at this stage, remember to open the zipper three-quarters of the way.
Turn the fabrics so that the two outer fabric pieces are right sides together, and the two lining pieces are also right sides together; align the fabric edges well and pin to hold in place.
Now, let's sew the sides of the outer pieces. Be careful to push back the lining (where the arrow points in the photo below) to avoid catching it in this seam. Stitch as close as possible to the clean finish strip covering the end of the zipper, but without sewing over it.
We do the same on the other side.

Next, to sew one side of the lining, pull the lining fabric to place it on the outer fabric (where the arrow points to the right above) and sew the side starting a little above the previous seam, where the arrow points to the left. This way the side seams meet.
We do the same on the other side.

All that remains is to form the pouch bottom.
Sew the pouch bottom
Now sew the bottom of the outer pouch pieces and the bottom of the lining pieces (orange lines below).
Be careful, check that the zip is fully open before sewing the pouch bottom, and we will leave a 5 cm opening in the bottom seam of the lining. This will allow turning the pouch at the end!

We will now close the openings remaining in the corners of the pouch bottom to form the flat bottom. To do this, open all the seams by pressing with a hot iron or with your fingers, then starting from a bottom corner, form a triangle to close the opening between the side seam and the bottom seam, check the alignment of the previous seams, then stitch along the orange line (below).
A tip to check that the seams are well aligned: insert a pin into the seam, it should come out exactly through the seam on the other side.

Repeat the operation on the other corner, then on the corners of the lining.
Sewing pouch step 4 tutorial: Turn the pouch and finish it
And we come to the magical moment, where everything takes shape! Through the opening left at the bottom of the lining, gently pull (careful, don’t tear everything) on the fabrics to pass the pouch through the opening, from where it should come out right side out.

By sliding a pencil or a wooden kitchen spoon into the opening, push well the corners of the bottom, and the 2 ends of the zipper, so that the clean finish strips are properly in place (where the 4 arrows point).

All that remains is to close the opening at the bottom of the lining by stitching close to the edge with the machine, or for perfectionists, with an invisible hand stitch.
After a little ironing, push the lining inside the pouch, and there you go!
Our pretty pouch with its nicely finished zipper and flat bottom, which will help it stand well, is ready to keep and carry our little treasures (makeup, toiletries, sewing accessories, and many others...)

There you go, we hope this sewing tutorial has inspired you to sew lots of pretty pouches! If you try it, write to us in the comments to share your experience. Happy sewing!