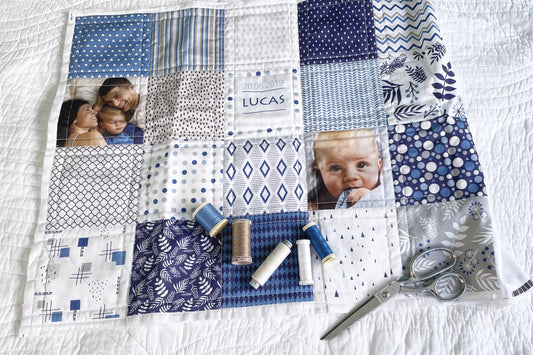
Free customized family photo quilt pattern - LUCAS pattern
Here is a patchwork model for beginners to make a quilt or contemporary patchwork quilt with your family photos. The effect is so pretty that experienced quilters looking for a quick personalized photo project might well be tempted...
This easy beginner pattern has many advantages:
- It is suitable for learning patchwork, thanks to its simple assembly technique (pieced squares)
- It is presented in several variations: with or without strips between the squares, with or without a large photo.
- Various styles possible: I present it to you in a modern patchwork version, but by choosing different fabrics, it can perfectly adopt a country or traditional patchwork look.
- It's an excellent quilt project to use your fabric scraps!
And to make life easier, it is available as a kit in the FibraCreativa shop.
See the LUCAS quilt kit

What you need to make this customized quilt with family photos
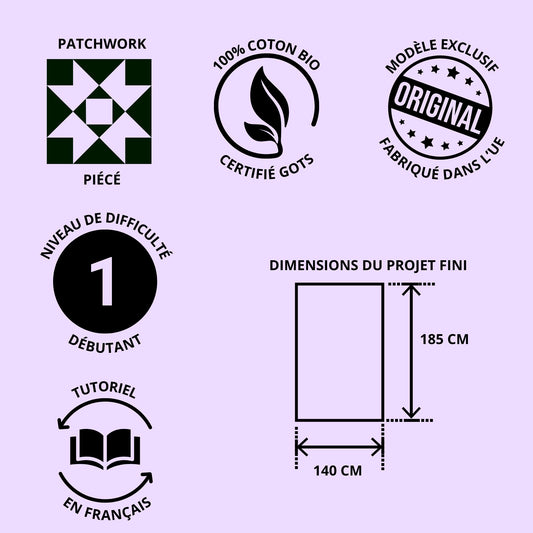
The quantities indicated correspond to a quilt of the model's dimensions: 80 patchwork blocks for a total size of about 130x160 cm. This project is very easy to enlarge or reduce, just add blocks.
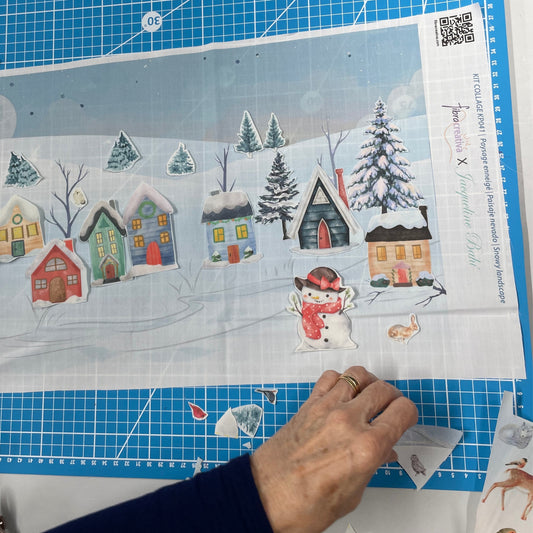
- A panel of 13x13 cm photos printed on cotton fabric for patchwork for sale in the FibraCreativa online shop.
- A large photo printed on fabric 45x30 cm, which you will also find in the shop.
- About 70 squares of 13x13 cm (depending on the number of photos you will use and the size of the finished quilt) of printed fabrics matching each other and in colors matching the photos. It's time to dig through your drawers...
- White fabric for patchwork (about 1 m)
- Fabric of a matching color for the bias, plus fabric for the back of the quilt (about 140x180 cm).
- Batting for patchwork (140x180 cm approx).
- Cotton threads for sewing and quilting.

How to make the personalized patchwork quilt photos LUCAS
The seam allowances are 5mm. The instructions are given to optimize machine sewing. Of course, the quilt can be sewn and quilted by hand.
Cutting the patchwork pieces
- Cut 13x13 cm squares from the printed fabrics.
- Cut the photos (13x13 cm)
- Cut strips of white fabric 3 cm wide.
Top sewing
- Arrange photos and printed fabric squares of 13x13 cm along a fabric strip so that the right edge of the squares is aligned with the white strip. Sew, then press the seam open, and trim the squares. You get blocks made of squares with a white strip sewn on the right side.
- Repeat this operation to prepare all the blocks. Attach a white strip to the right side of the large photo in the same way.
- Distribute the blocks harmoniously to compose the quilt, spreading out the photos and the colors of the prints, and placing the large photo wherever you want.
- Once satisfied with the composition, sew together the blocks of each horizontal row.
- Then assemble the rows together, paying attention to the vertical alignment of the blocks to get clean intersections.
Borders, finishing, and stitching
- Cut strips of white fabric 12 cm wide and the length of the quilt's height, and sew them on the left and right edges. Then add the top and bottom edges in the same way.
- Make the sandwich with batting and backing fabric and quilt to your liking. Yes, I know, we all hate finding this expression in instructions that leaves us puzzled... So here is a suggestion: this pattern lends itself well to grid quilting, 1 cm from the sewing lines, as shown in the detail photo. Simple to do and a nice effect.
- And there you go, all that's left is to place the binding, sew the label on the back, and your personalized photo quilt is finished!
Composition variants for the customized LUCAS quilt
Here are some variations for this model:
- Replace the large rectangular photo with alarge square photo of 30 cm or 45x45 cm. This is a good option if you want to place the photo in the center on a square quilt, with a medallion layout.
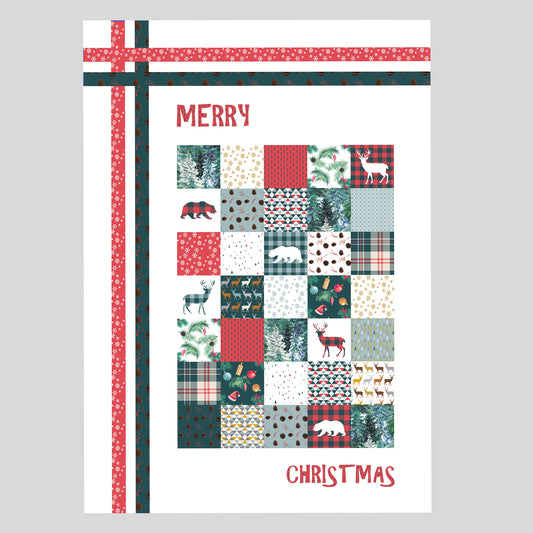
- Remove the large photo, the quilt is also very pretty with only small photos (image below), and the composition will be even simpler.
- Remove the white strips between the blocks. Then just sew the squares directly together.
- Widen the white strip between the blocks. This enlarges the quilt without practically increasing the work.

To further personalize your patchwork quilt, you can add printed squares with personalized texts like in our example. It’s very easy to do when you order your photo panel.
How to adapt the dimensions of the LUCAS patchwork quilt
To create a larger quilt, 2 options:
- add blocks until you reach the desired size. You can also vary the dimensions (wider quilt, longer, or square). For a very large quilt, consider adding photos so that the photo/printed fabric proportion remains roughly equivalent. Bonus, this allows you to include more people or situations.
- make larger squares, for example by choosing a 20x20 cm photo panel and cutting the other printed fabrics to the same size. Your project will grow faster and be less laborious than using small squares. Larger blocks look great on a large quilt, and moreover, the faces will be more visible.
Some tips to better succeed in patchwork quilt with photos
Take care of the color harmony of your photos
Color harmony is one of the factors that determines the success of a quilt.
If the photos are in similar colors, it greatly facilitates the choice of printed fabrics. Just coordinate the fabrics with the photos. For example, with the photos below, one could choose prints in beige, gray, and steel blue tones.

But what to do if your photos reveal a potpourri of colors? Here are 2 tips to achieve a harmonious result:
- choose prints that are also very varied and include most of the colors present in the photos.
- convert photos to black and white (or sepia) before printing them on fabric, as explained in this post.
Happy patchwork and quilting!